Here are pictures of the special frames:
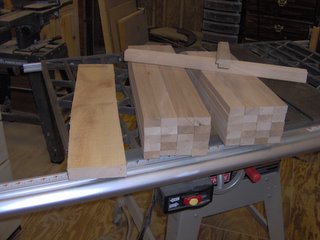
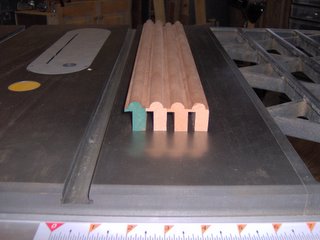
Rough sycamore board on left. Planed and sized inner frame pieces on right. Sample with finished profile on top.
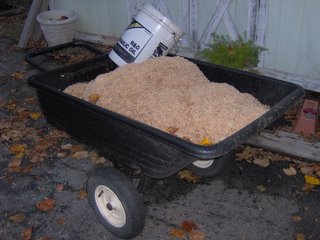
Sycamore shavings from planing the parts for the inner frames.
Cherry outer frame parts before planing. Needed 8 more.
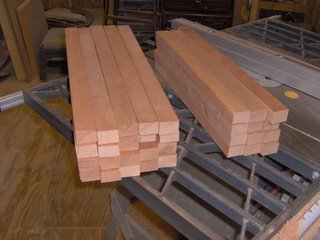
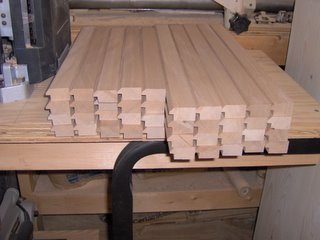
All the sycamore after shaping.
Some cherry outer frame pieces after planing and shaping.
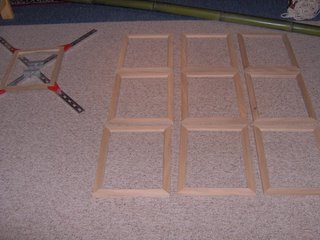
Mockup of outer and inner frame pieces, dry fitted at a mitered corner.
All the sycamore inner frames, sorted, dry fit, and one already glued and clamped.
All the cherry outer frames, dry fit, and one glued and clamped.
These picture frames are for two long time friends of mine. We have all been involved in Tae Kwon Do since January of 2000. Two of us have earned second degree black belt. The other earned first degree. They each have sons that earned first degree. For each degree earned one gets a nice certificate from Korea, but these come in a cheap frame. So, I am making 5 frames for each friend.
Each frame is really an outer frame of cherry and an inner frame of sycamore. The cherry comes from my yard. The sycamore comes from the yard of one of these friends. I cut these trees down myself and have performed all of the milling steps except cutting the tree into rough lumber.
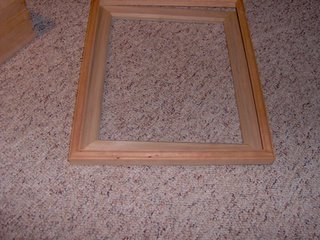
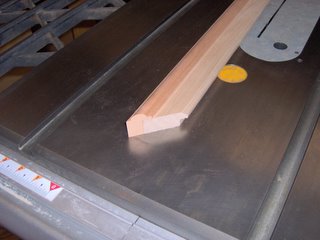
The outer frame has a "shouldered bullnose" and the inner frame has a bevel. The bevel makes it look like a "matte." The frames look pretty because of the design and the contrasting wood colors.
To date all the pieces have been rough cut, milled to size, shaped, rabbeted, mitered to length, and assembled. That was TWENTY frames. Once a particular cut was set up, it wasnt a big deal to do that cut repeatedly, so more frames didnt mean a lot of extra time.
I built a mitering sled for the table saw. This is now an indispensible jig for my workshop. It has runners that fit in the channels of the table saw and a pre-set triangle which creates perfect 45 degree cuts while the tablesaw is set to cut at 90 degrees. One side has a sliding stop block set into a T-track. Using this device I cut all of the "left miters" on one side, one at a time. Then I set the stop block . To set the stop block I cut a piece a little long, test the length, then trim it a little at a time until perfect, moving the block for each test cut. Once it is perfect, the block is set. Finally, I cut all the right miters one at a time.
Pitcures soon.
Read More..
I picked up this piece for a good price, sans legs! Which is fine. I have been wanting
to order some hairpin legs and attach those to the right piece.
Looks pretty rough right?? Dont be afraid to pick up a piece that looks like this. Wood is so forgiving!
(Sometimes!) Although these are usually veneered, if the damage isnt too deep, you can sand it right off!
Take a peek at the after!

I was going to paint it. But the wood really turned out nice. Then I thought I would just paint the drawers. But they really turned out nice! Well I had to paint something! So I did the turquoise
on the insets, but it wasnt enough. So, I though I would try some graphic lines. Done!
Frog tape!
I did graduating grits for sanding, conditioned it prior to staining, used "Kona" to stain, another fine sanding, and then a semi-gloss sealer from "Deft". Used steel wool on that, and then a second coat!
Look at how rich this walnut is!! I just love it with turquoise or orange. Plus it fits the era.


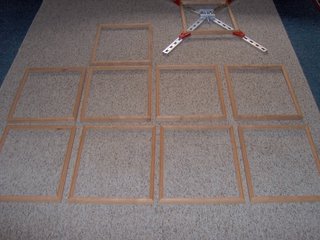
 The 10 sycamore inner frames and 10 cherry outer frames, all glued up. They look small, but the inner frame is for an 11x14 picture.
 One frame each, upside down. This picture shows how the inner frame is just a little larger than the space it will fit into. It will be trimmed for an exact fit.
 One frame each, right side up and mocked up. The upper right corner shows that the inner frame is still a little too big.